39 how to print vertical labels in word 2013
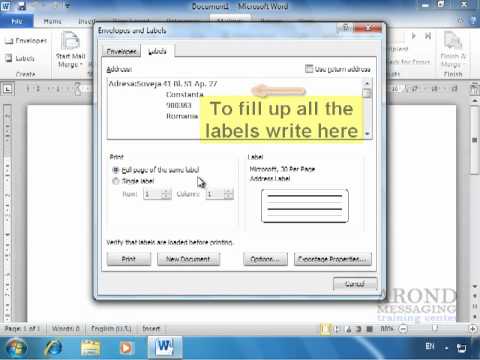
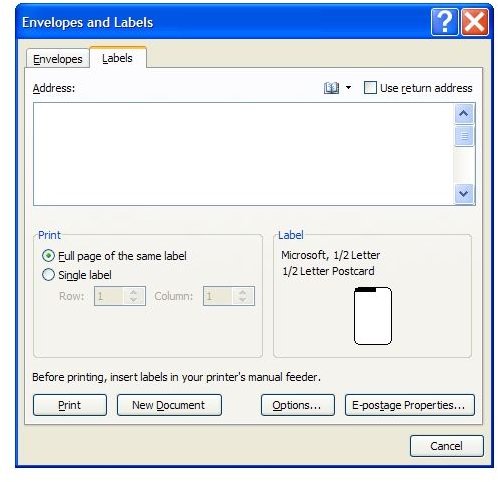
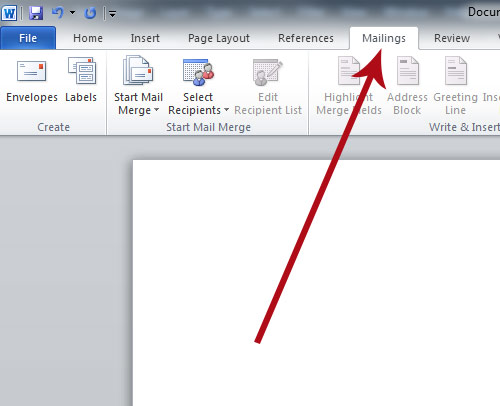
How to Vertically Align Text in Microsoft Word - Lifewire Select the text you want to vertically align. Go to the Layout tab (or Page Layout, depending on the version of Word). In the Page Setup group, select the Page Setup dialog launcher (it's located in the lower-right corner of the group). In the Page Setup dialog box, choose the Layout tab. How to Create, Customize, & Print Labels in Microsoft Word A. Create and Format the Address. Open Word and click Mailings on the menu line. Then click Labels on the ribbon. In the "Print" section of the Labels window (not the Print button at the bottom), choose "full page of the same labels." Click the Options button at the bottom of the window. Select the product number from the list, and click OK.
How to write text vertically in Microsoft Word - YouTube This quick tutorial shows you how you can insert vertically written text in Word

How to print vertical labels in word 2013
How to Print a Sheet of Identical Labels in Word 2013 - dummies Just follow these steps: Click the Mailings tab. You should see a Create group option. Click the Labels button (in the Create group). The Envelopes and Labels dialog box appears, with the Labels tab ready for action. Use the Address box to type the text you want printed on the label. Vertically Centering Labels (Microsoft Word) - WordTips (ribbon) Press the End key to move to the end of the line. Press Delete to delete the paragraph marker. Keep pressing Delete until the end-of-cell marker is at the end of the line. Repeat steps 3 through 5 for each label on the sheet. Your labels should now be centered vertically. WordTips is your source for cost-effective Microsoft Word training. Typing vertically in Word 2013 - Super User
How to print vertical labels in word 2013. How to use MS Word to create name badges Step 2: Open a new document in MS Word and select Mailings from the top tab and then Start Mail Merge from the line below by either selecting labels or step by step Mail Merge Wizard. Step 3: Select the Step by step mail merge wizard and select labels from the left-hand menu. Then select Next: Starting document from the bottom of the menu. 3 Ways to Change the Orientation of Text in Microsoft Word 19 steps1.Follow this method for horizontal letters in a vertical orientation. This method creates text with each letter of a word below the last, like a tall, narrow ...2.Insert a text box. A text box makes it much easier to adjust the position and orientation of text. Add it to your Word document as follows: Word 2007 or ...3.Type in your text. Click the text box and type in the text you'd like to orient vertically. If you already typed it in to the document, copy and paste it ... How to Print Vertical Labels | Small Business - Chron.com Click on "OK." 6. Click on the "File" menu and then the "Print" tab. Click on the arrow next to the Page Orientation information and select "Landscape Orientation" for vertical printing. 7. Turn on... EOF
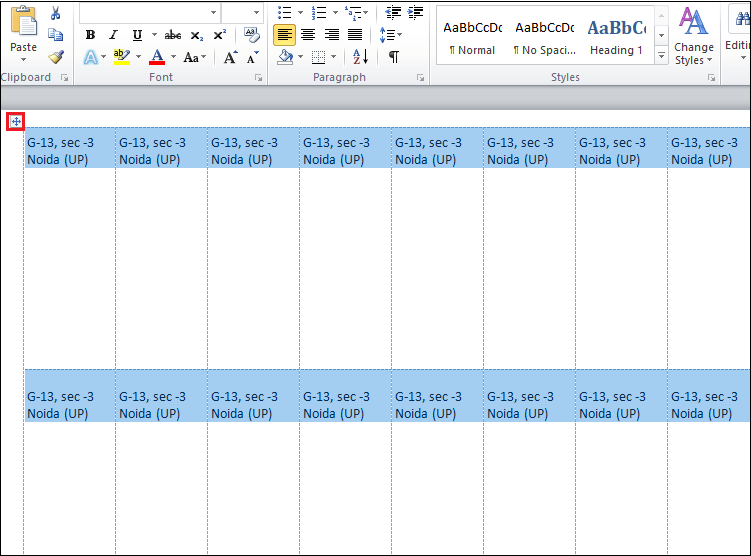
Create and print labels - support.microsoft.com Create and print a page of identical labels Go to Mailings > Labels. Select Options and choose a label vendor and product to use. Select OK. If you don't see your product number, select New Label and configure a custom label. Type an address or other information in the Address box (text only). How to write text vertically in Microsoft Word - Knowl365 Create text vertically in Word using WordArt. You can always change the orientation of your text in Microsoft Word by following the steps below. First, go to the Insert tab at the top of your Word document. Go to the Text group in the ribbon > Then click on the WordArt icon. Once you click on the WordArt icon, it will open a selection of ... Rotate text in Word - support.microsoft.com Do one of the following steps: Select the text box, and then go to Shape Format or Drawing Tools Format > Rotate. Use any of the rotate commands in the list. Manually rotate the text box by selecting the text box rotation handle and dragging in the direction you want. To keep the rotation to 15 degree angles, press and hold Shift while you drag ... Sequentially Numbered Labels (Microsoft Word) Select the entire first row of labels and press Ctrl+C. Press the right arrow, which should place your insertion point immediately after (beneath) the first row of labels. Press Ctrl+V to paste a new row of labels. You should now have two rows of labels, correctly formatted. (Don't worry yet that they have the same numbers on them.)
Video: Create and print labels - support.microsoft.com Make it easy: Use a template. Start Word, or click FILE > New. Type Return address label in the Search for online templates box and press Enter. Click the picture of the template you want and click Create. In the first label, click each line of the address and type the information for your return address. Word updates all the labels as soon as ... label problem on Word 2013 - Microsoft Community Again, the label looks correct on the screen when checked against the rulers in Print Layout view. When I print it, the width of the labels is now correct (horizontal dimension), but the length (vertical dimension) seems to be scale down to about 90% of the size I need (same dimensions as I experienced in Word 2013 with Windows 8.1). Vertically Centering Labels (Microsoft Word) Press the End key to move to the end of the line. Press Delete to delete the paragraph marker. Keep pressing Delete until the end-of-cell marker is at the end of the line. Repeat steps 3 through 5 for each label on the sheet. Your labels should now be centered vertically. WordTips is your source for cost-effective Microsoft Word training. Tips for printing labels with Microsoft Word - Avery.com This action moves the entire table down, which will make the print come out too low on the labels. Avoid this by hitting the space bar on your keyboard before hitting Enter. If you already moved the labels lower, you can make an adjustment using the Ruler feature in Word. If the ruler isn't showing at the top and down the left side of the ...
How to Create and Print Labels in Word - How-To Geek Open a new Word document, head over to the "Mailings" tab, and then click the "Labels" button. In the Envelopes and Labels window, click the "Options" button at the bottom. Advertisement In the Label Options window that opens, select an appropriate style from the "Product Number" list. In this example, we'll use the "30 Per Page" option.

How Do I Print Labels in Word? | Techwalla.com
How to Vertically Center Text in Word 2013 - Solve Your Tech How to Vertically Align Text in Word 2013 Click the Page Layout tab. Click the Page Setup button. Click the Layout tab on the Page Setup window. Click the Vertical alignment drop-down menu, then click the Center option. Click the Apply to drop-down menu, then click the Whole document option. Click the OK button.

Word Label printing - Microsoft Community
Typing vertically in Word 2013 - Super User

Cara Membuat dan Print Label Undangan di Word dengan Cepat - ITPOIN
Vertically Centering Labels (Microsoft Word) - WordTips (ribbon) Press the End key to move to the end of the line. Press Delete to delete the paragraph marker. Keep pressing Delete until the end-of-cell marker is at the end of the line. Repeat steps 3 through 5 for each label on the sheet. Your labels should now be centered vertically. WordTips is your source for cost-effective Microsoft Word training.
Using Word 2010 - Set Up Labels to Print - YouTube
How to Print a Sheet of Identical Labels in Word 2013 - dummies Just follow these steps: Click the Mailings tab. You should see a Create group option. Click the Labels button (in the Create group). The Envelopes and Labels dialog box appears, with the Labels tab ready for action. Use the Address box to type the text you want printed on the label.

Barcode labels in Microsoft Word 2016, 2013, 2010, or 2007 Mail Merge

How to make labels on word 2007 - YouTube
Solved: How to get rid of the word "Vertical" in Cross Sections labels in C3D 2013 - Page 2 ...
How to create labels in Word - javatpoint
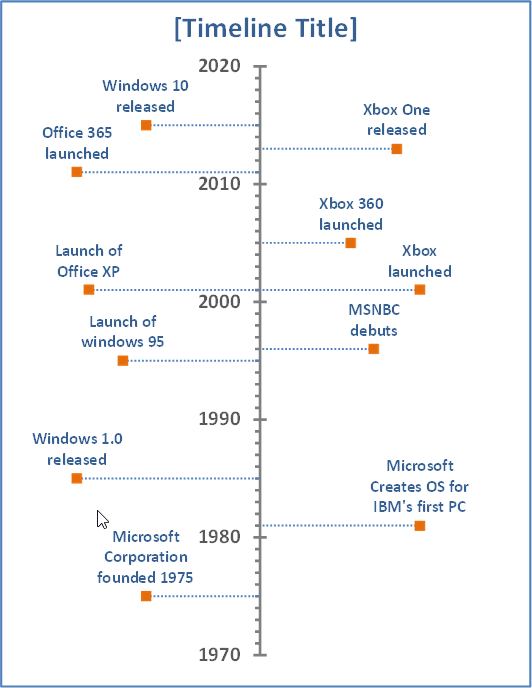
Microsoft Excel Templates: Vertical Timeline Excel Template

Create Labels In Word 2010

How Do I Print Labels in Word? | Techwalla.com
How to Print Professional Labels in Word 2007


How to Create a Microsoft Word Label Template - OnlineLabels.com

TPT - Fonts 4 Teachers: May 2013
Post a Comment for "39 how to print vertical labels in word 2013"